Many nail enthusiasts struggle to create festive, eye-catching designs for Christmas. Some want something easy and quick to execute, while others dream of intricate, salon-worthy looks. Regardless of your skill level, finding that perfect holiday sparkle can be a challenge.
This article provides 20 Christmas nail design ideas that are stylish, fun, and easy to replicate for any skill level.
From simple DIY looks to modern holiday nail art, this post covers designs for beginners, intermediates, and salon-goers. By the end, you’ll have inspiration for every mood, occasion, and nail length.
Easy Christmas Nail Designs
These beginner-friendly designs are simple, quick to create, and perfect for first-time festive manicure attempts, requiring minimal tools and polish.
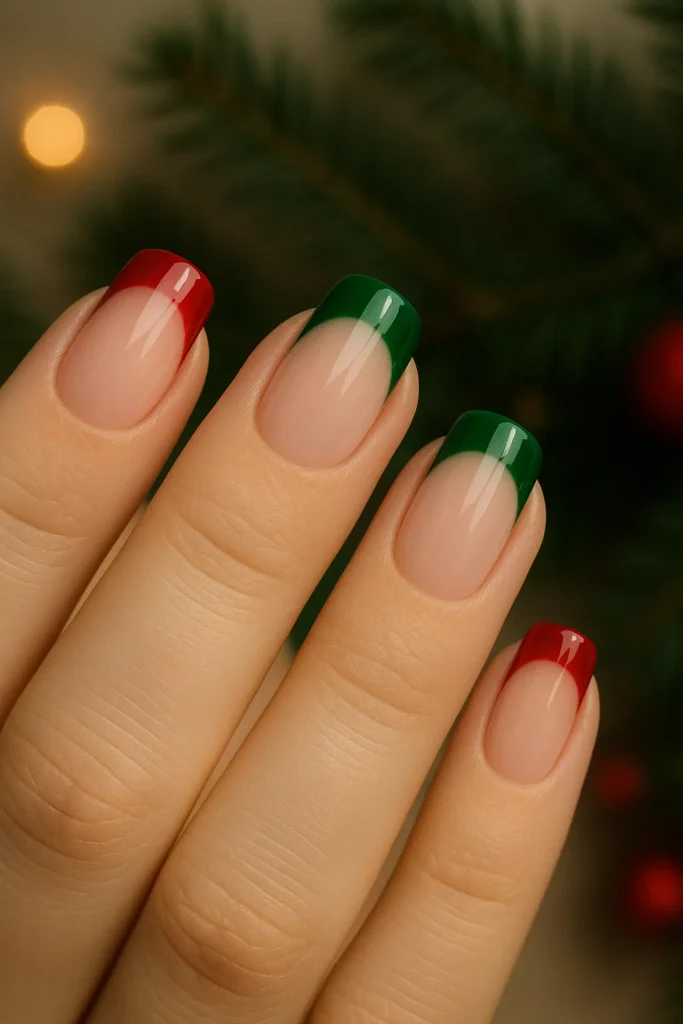
Classic Red and Green Tips
This is a timeless, fuss-free approach to holiday elegance that requires zero art skills. Simply paint alternating nails a bold, saturated Christmas red and a deep forest green for a sophisticated, classic look. This high-impact manicure is perfect for anyone wanting simple festive charm without the need for intricate details. Pro Tip: Ensure you use a high-quality, glossy topcoat to give the rich colors a professional, salon-like finish.
Polka Dot Snowflake Nails
Achieve a cute, delicate winter look by layering simple white patterns over a light-colored base, such as pale blue or pastel pink. After applying your base coat, use a small dotting tool and white polish to create a central snowflake shape, then fill in the remaining space with random polka dots for a playful, snowy effect. This design provides a whimsical winter vibe that is much easier to execute than full, complex snow scenes.
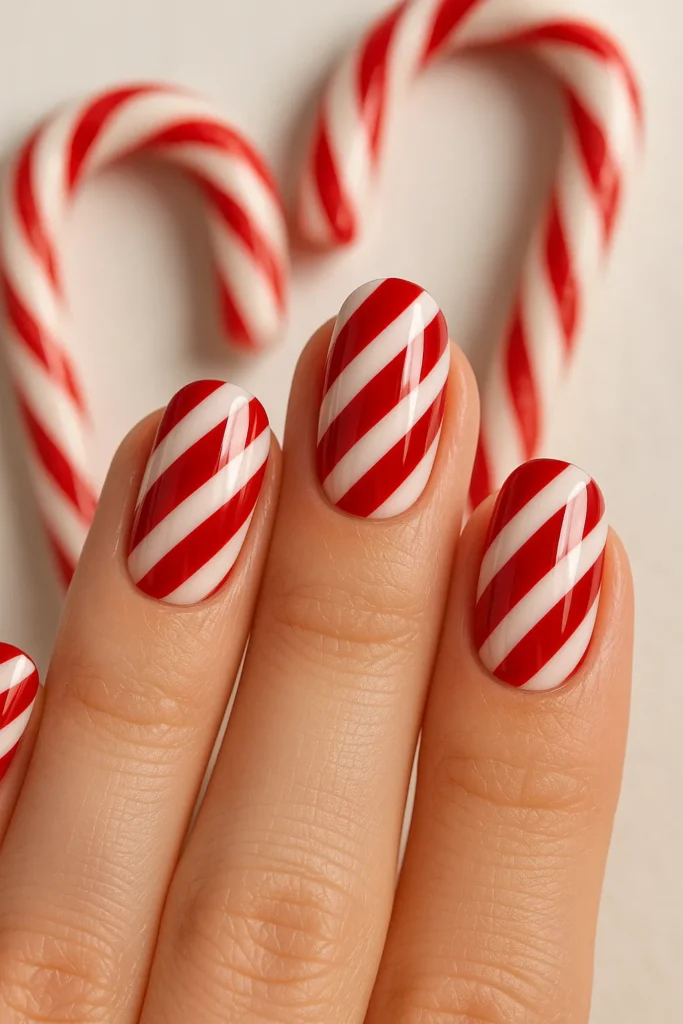
Candy Cane Stripes
Capture the iconic look of the holidays with classic candy cane stripes diagonally painted across your nails. Start with a clean white base, allow it to dry completely, and then use a thin striper brush or striping tape to apply bold red lines running from the top corner to the opposite side of the tip. This is a simple yet instantly recognizable festive style that works wonderfully on both short and long nails.
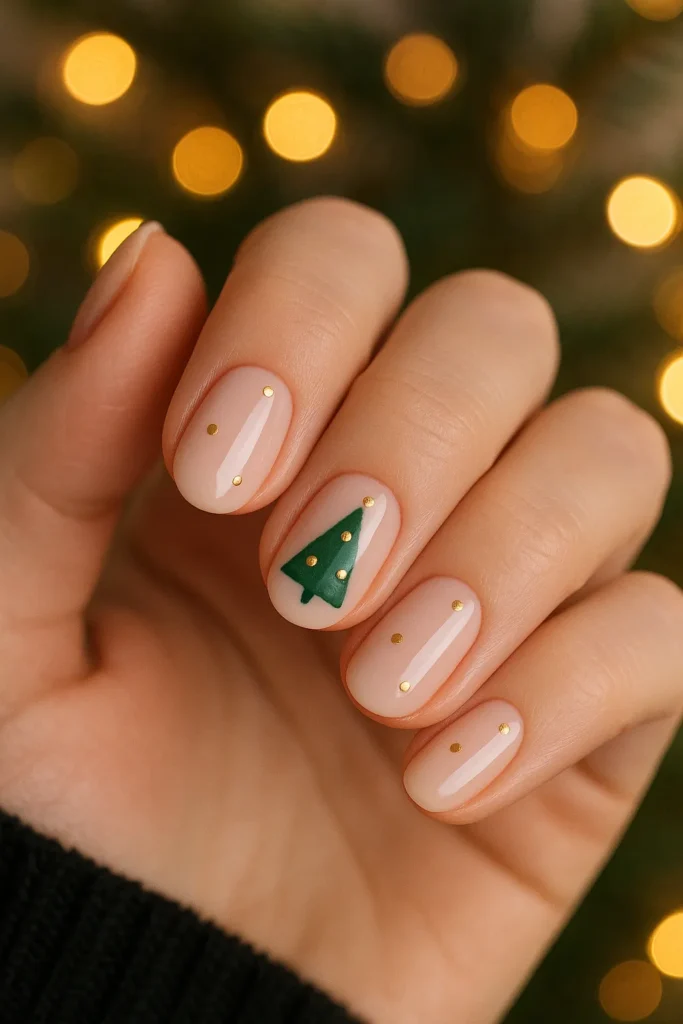
Minimalist Tree Accent
For an elegant, understated touch, dedicate a single accent nail to a minimalist Christmas tree design. Paint all nails in a nude or neutral color, and on the ring finger, use a small striper brush to create a simple, filled-in green triangle. You can add one or two tiny gold dots at the base or tip to act as a star or ornament, providing a subtle nod to the season without overwhelming the manicure.
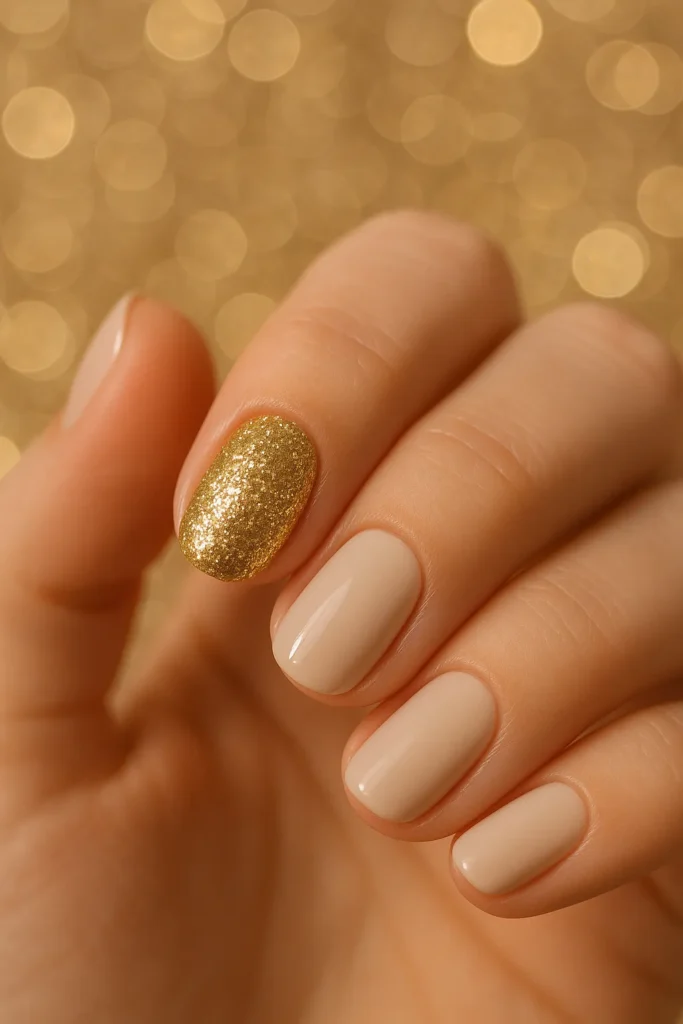
Glitter Accent Nail
The easiest way to introduce holiday sparkle is with a dedicated glitter accent nail. Choose your favorite neutral or classic holiday color (like burgundy or navy) for the majority of your nails, and then fully coat one nail—typically the ring finger—in a chunky gold or silver glitter polish. This contrast creates balance, allowing you to enjoy maximum sparkle while keeping the overall look neat and stylish.
Modern Holiday Nail Art
These trendy designs incorporate metallics, negative space, and geometric shapes for a cool, contemporary look that elevates traditional holiday colors.
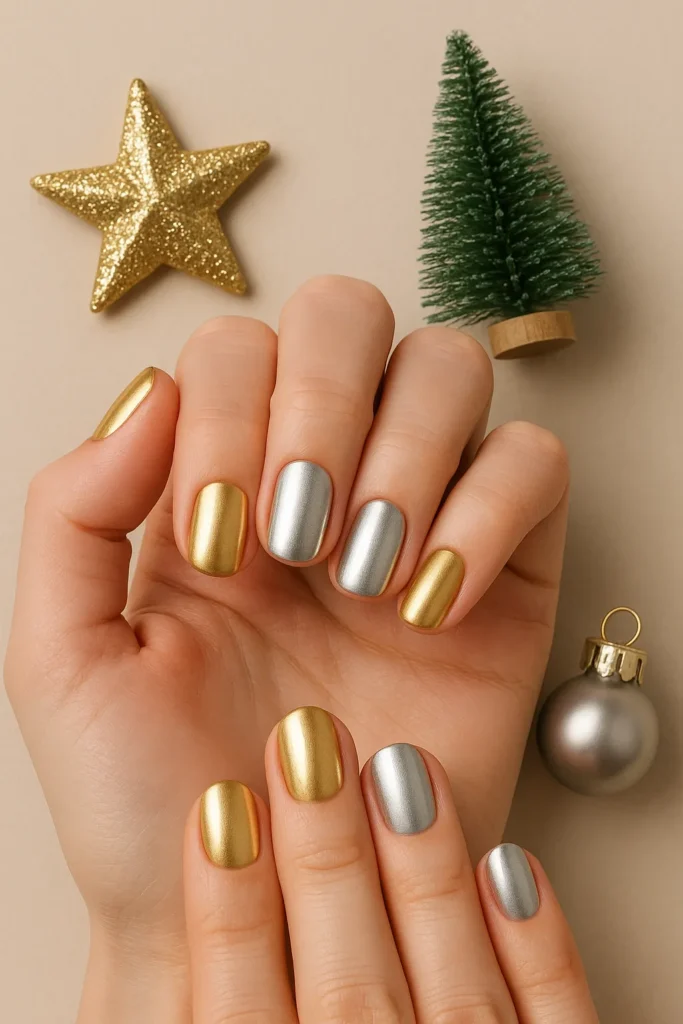
Metallic Gold & Silver Combinations
Forget traditional rules—modern holiday nails embrace mixing metals for a high-fashion, luxurious feel. Alternate painting your nails solid shades of metallic gold and high-shine silver, ensuring the colors are reflective and flawless. This combination creates an expensive, sophisticated manicure that looks fantastic under holiday lights, requiring no freehand painting, just perfect polish application.
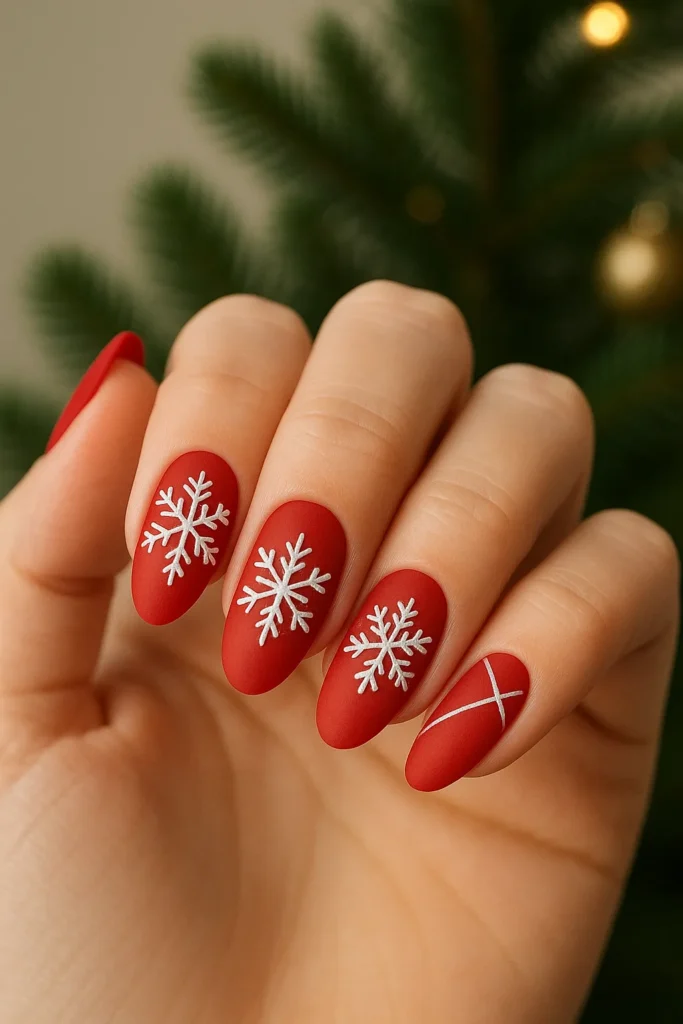
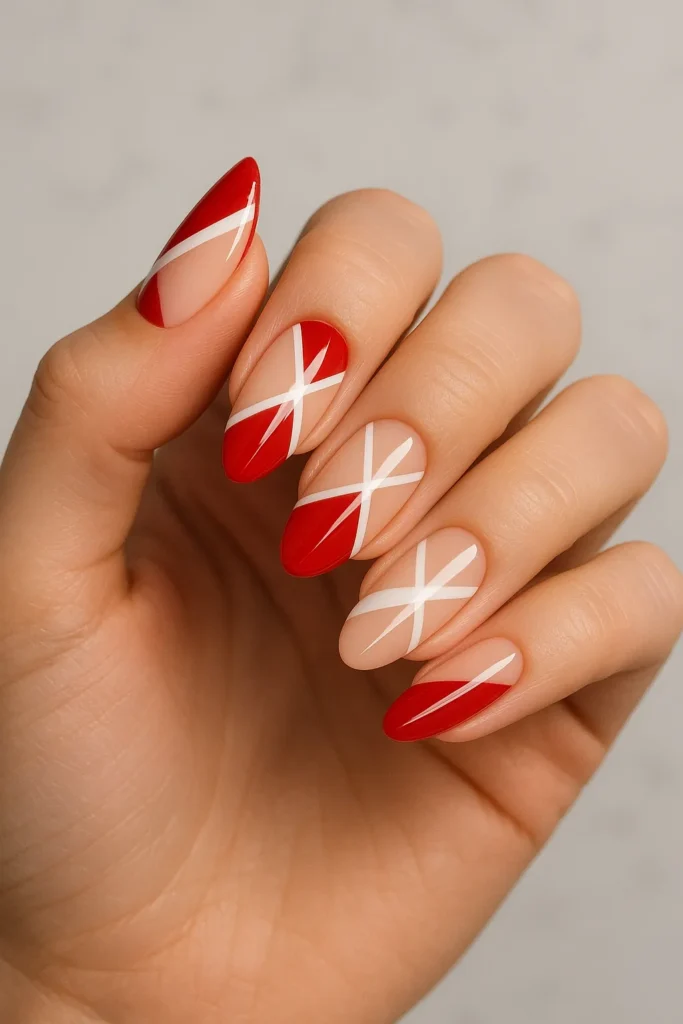
Matte Red with Shiny White Accents
This design plays with texture, offering a modern twist on the classic holiday color palette. Apply a rich matte red polish to all nails, then use a glossy white polish to add small, precise details like tiny snowflakes or clean, straight lines over the matte surface. The juxtaposition of the flat matte base against the reflective glossy accents provides a sophisticated and incredibly trendy finish.
Negative Space Christmas Patterns
Negative space is a huge trend in modern nail art, offering a sleek, minimalist canvas. Apply striping tape to create simple holiday motifs like triangles or vertical lines, paint over the entire nail with a sheer nude polish, and then immediately remove the tape while the polish is still wet. The resulting clear areas create elegant patterns that feel airy and perfectly contemporary, letting your natural nail show through.
Geometric Holiday Shapes
Use angles and straight lines to create a festive yet contemporary look that avoids traditional cartoonish elements. Choose classic holiday shades like red, white, and hunter green, and use striping tape to section off the nail before painting defined triangles, chevrons, and thick straight lines. This design is clean, graphic, and offers a sharp, modern take on holiday cheer.
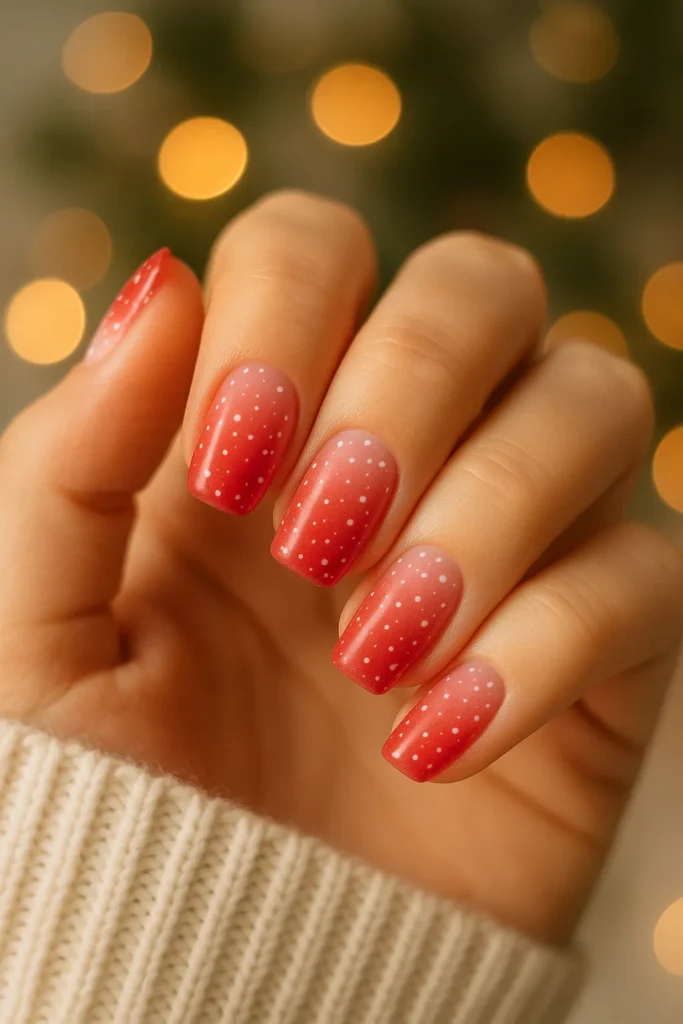
Ombre Snowfall Effect
This design merges the popular gradient technique with a winter theme for a soft, modern finish. Start with a saturated base color (red, green, or deep blue) and use a makeup sponge to softly blend white polish from the tip down, creating a flawless ombre fade. Once dry, use a very fine brush or dotting tool to add scattered, small white dots over the gradient to mimic falling snow.
DIY Festive Nails
These designs are easily achievable at home with minimal tools, polish, and a little patience, focusing on simple, thematic images.
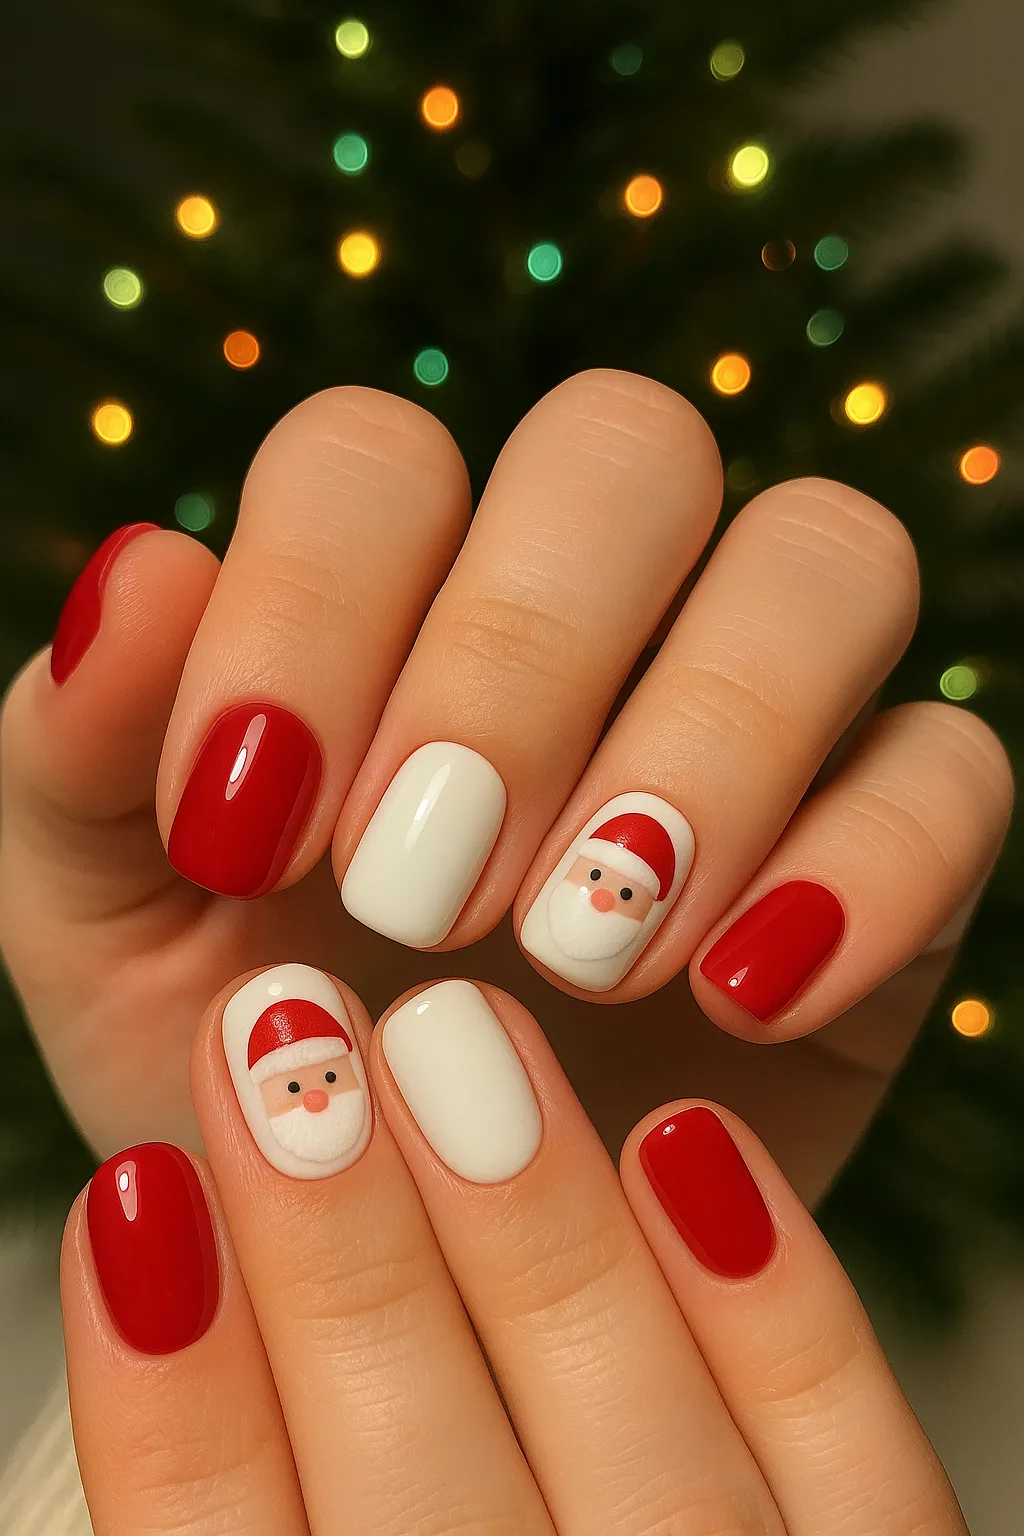
Hand-Painted Santa Hats
Bring a playful holiday character to your manicure by painting tiny Santa hats onto a few accent nails. After applying a nude or light-colored base, use a small detail brush to create a red triangle near the cuticle or tip, then add a white horizontal band and a small white dot (the pom-pom) using a dotting tool. This look is irresistibly cheerful and serves as a cute, unexpected accent to an otherwise simple mani.
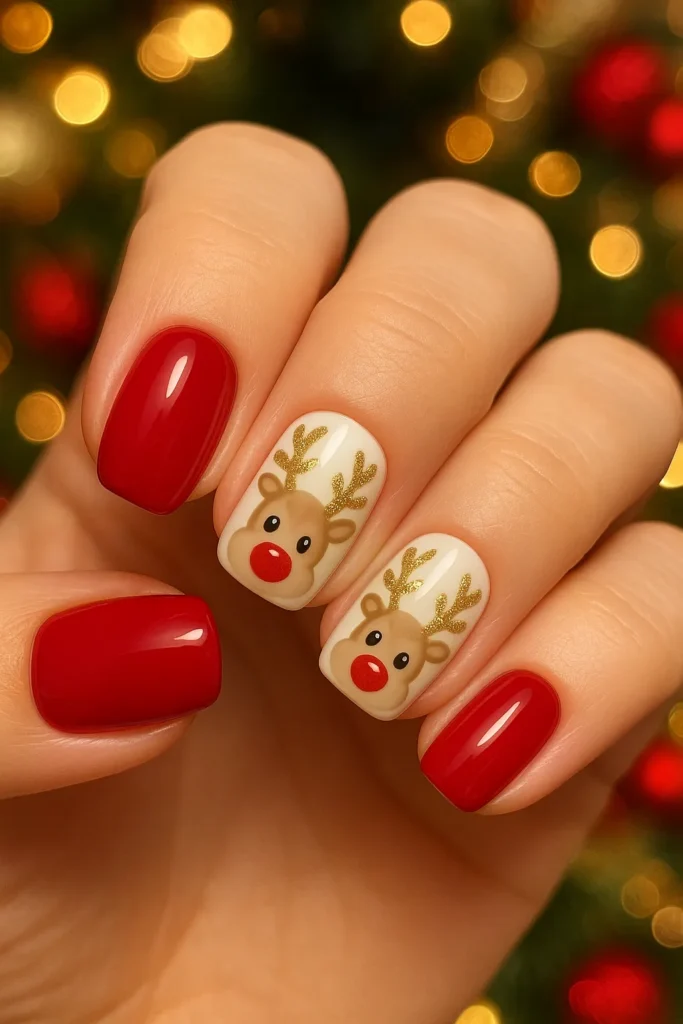
Reindeer Face Designs
Create adorable reindeer faces on your accent nails for a fun, festive focal point. Paint the nail with a light brown base; once dry, use a dotting tool to create two larger white dots for the eyes and a small, bold red dot (Rudolph’s nose) near the tip. Complete the look by using a thin striper brush or toothpick to paint simple gold or brown antlers curving up from the top of the head.
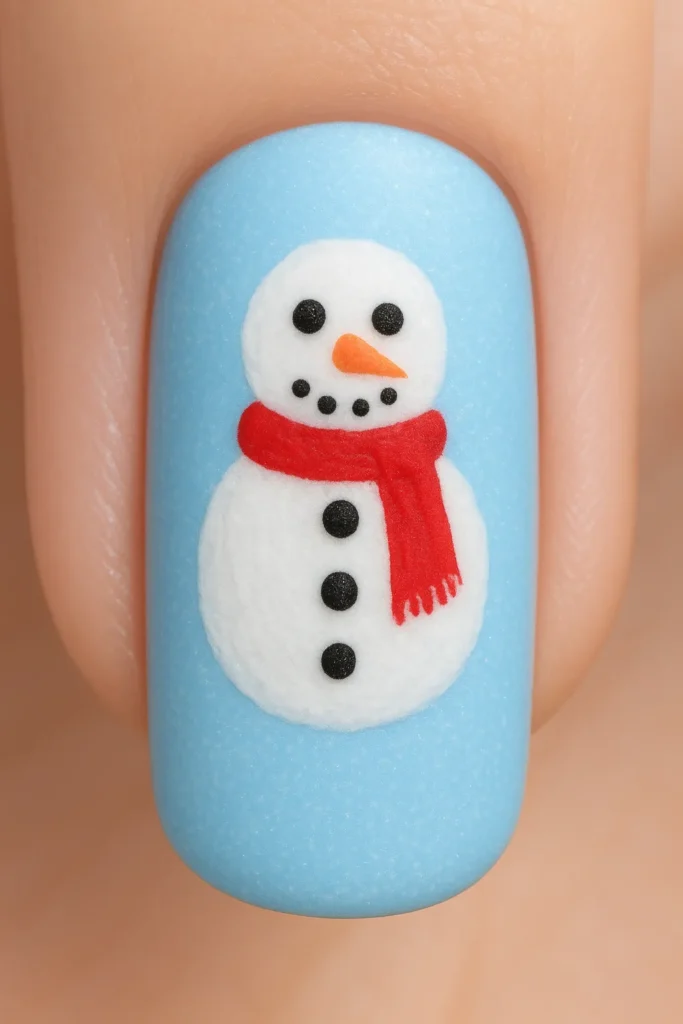
Snowman Nail Art
This classic winter design is easier than it looks and perfect for a cozy aesthetic. Use a pale blue or glittery white base to mimic a snowy backdrop, then paint one or two white circles using a medium dotting tool to form the snowman’s body on the accent nail. Finish the character with tiny black dots for eyes and buttons, and a small painted orange carrot nose for added whimsical detail.
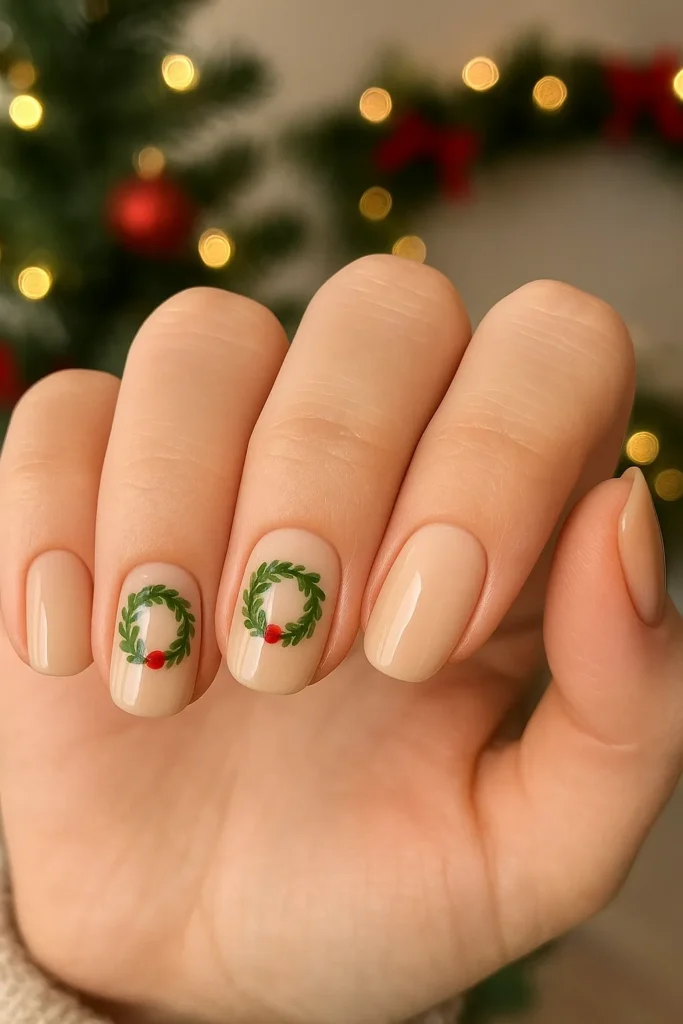
Christmas Wreath Miniature Design
Introduce a touch of sophisticated charm with miniature Christmas wreaths painted onto your nails. On a nude or neutral base, use a fine detail brush and green polish to carefully paint a small circle, then use small dots or short strokes to create a leafy texture around the ring. Complete the tiny wreath by adding minute red dots using a toothpick or the smallest dotting tool to represent berries.
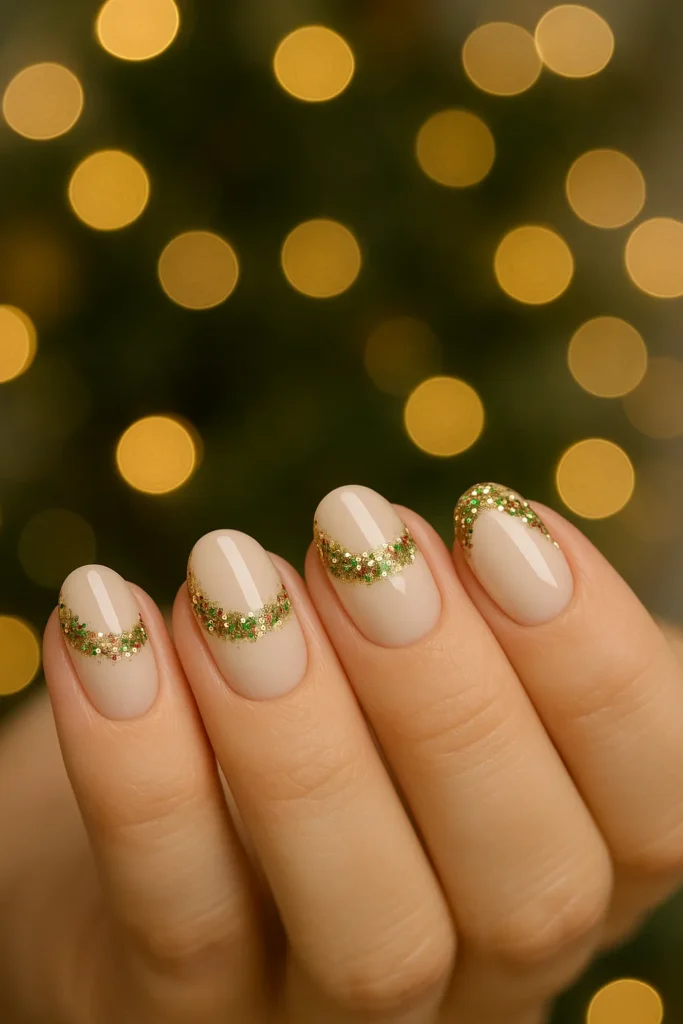
Sparkling Garland Tips
Give your French manicure a festive twist by turning the tips into sparkling garlands. Instead of a traditional white tip, use a saturated green polish to paint the tips, and then use a gold or iridescent glitter polish to create a layer that looks like twinkling lights. You can add tiny, random dots of red or gold polish over the green base to mimic ornaments hanging from the garland.
Cute Christmas Nail Designs
These playful, fun, and party-ready designs are perfect for casual gatherings and expressing maximum holiday cheer.
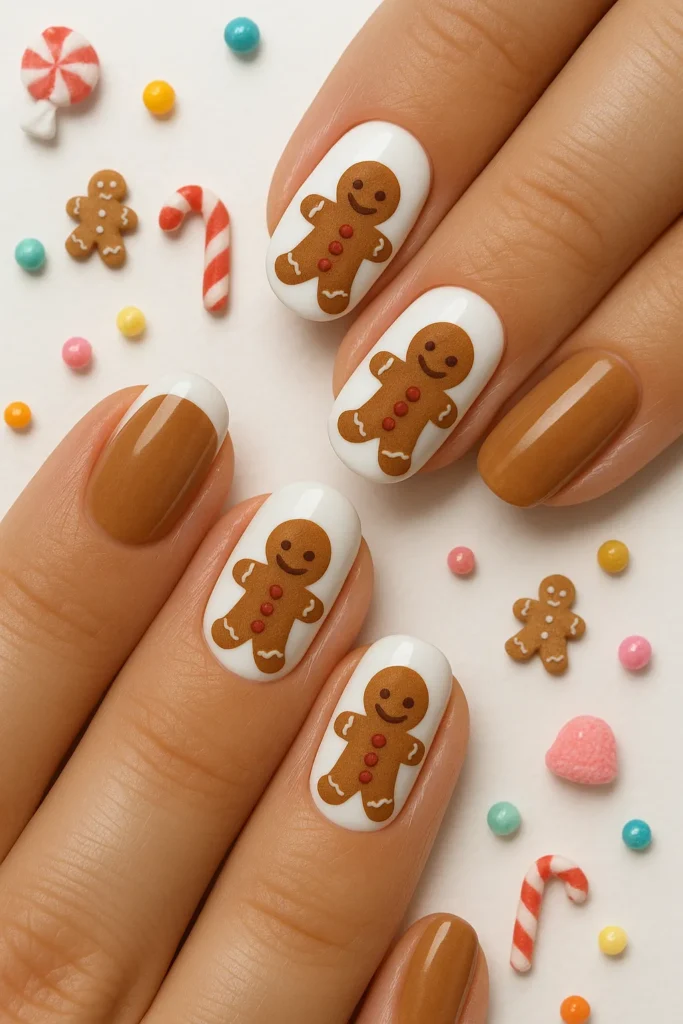
Gingerbread Man Accents
Showcase your love for holiday treats with adorable gingerbread men on an accent nail. Use a warm brown polish for the character’s shape over a creamy white base. Once the brown is dry, use white polish and a detail brush to draw simple frosting outlines and buttons, and tiny black dots for the eyes. This design instantly brings a charming, homemade feel to your manicure.
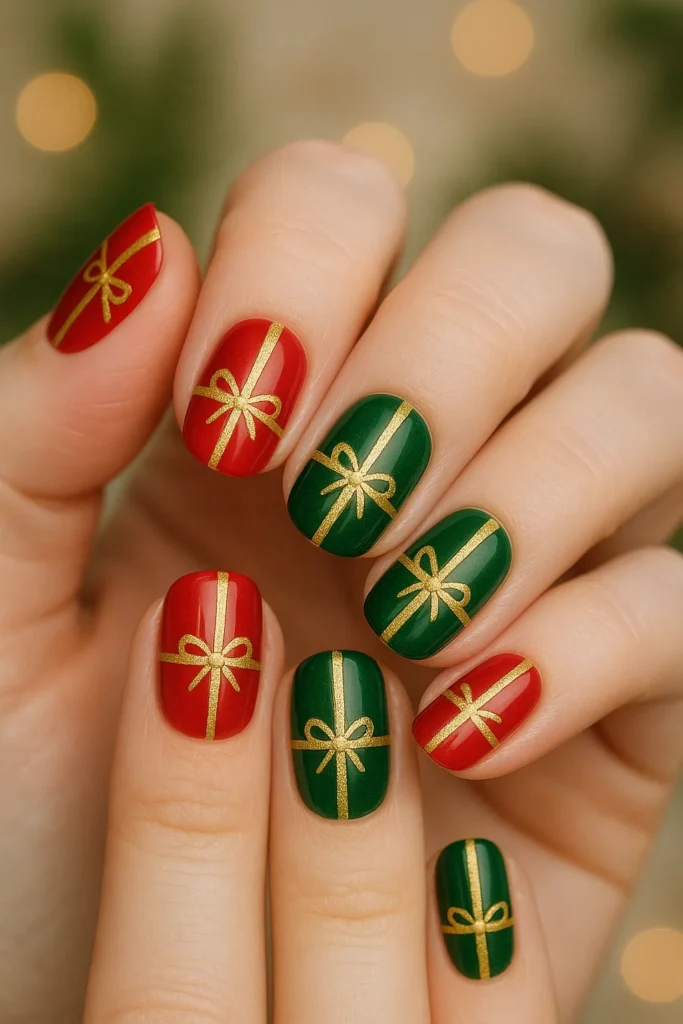
Christmas Gift Wrap Designs
Turn your nails into miniature wrapped presents ready for Christmas morning. Choose a bold base color like red or green, and once dry, use a thin striper brush and metallic gold or silver polish to paint perfectly straight crossing lines, simulating ribbon. You can further enhance the look by painting a small bow where the lines intersect on one or two nails.
Elf Shoes and Hats
For a whimsical, storybook-inspired manicure, focus on the iconic shapes of Santa’s little helpers. On an accent nail, you can paint a striped red and white pattern leading to a green curved tip (the elf shoe), or simply paint the entire nail green and add a red zig-zag or belt buckle design near the cuticle to represent the hat. This is a very playful, unique design guaranteed to start a conversation.

Festive Character Faces
Get creative by painting simplified faces of Santa, elves, or snowmen creatively across your nails. Instead of just using an accent nail, use the entire nail surface for a close-up face design, like Santa’s red hat and beard taking up the whole tip. Use basic color blocking and large shapes, allowing the cheerful expression to be the main focus of the design.
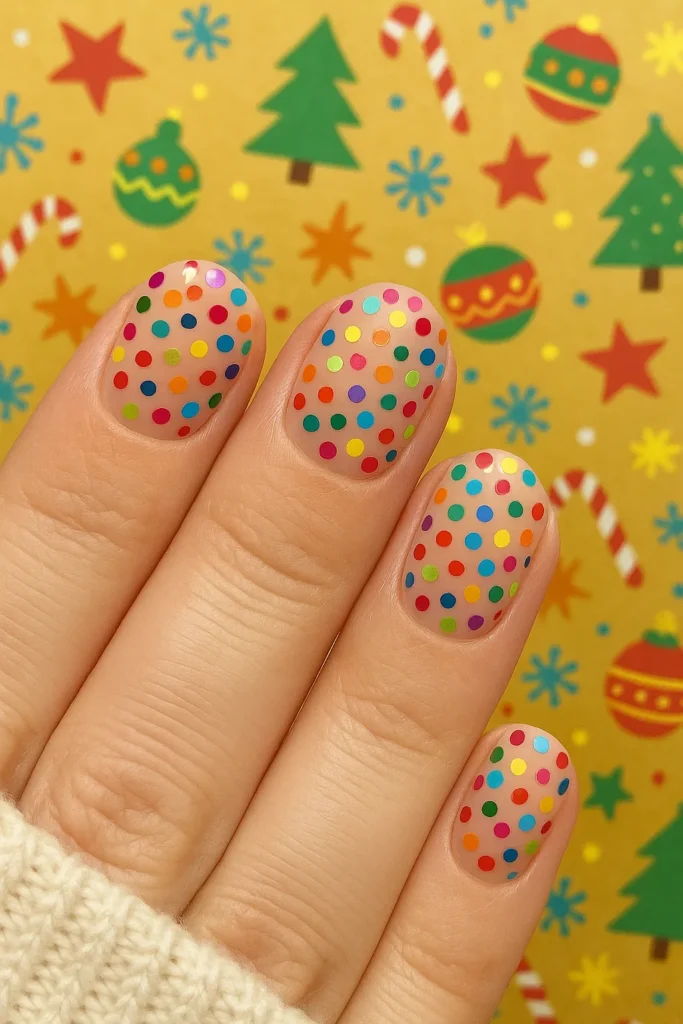
Candy Confetti Nails

Recreate the cheerful, colorful look of scattered holiday candies and sprinkles. Start with a neutral or milky white base and use several bright holiday colors—red, green, gold, and white—to paint small, randomly scattered dots all over the nail surface. The randomness makes this design incredibly easy, and the explosion of color makes it feel instantly festive and fun.
Trendy Christmas Nail Ideas
These designs reflect current trends in color, texture, and finish, offering a contemporary edge to your holiday look.
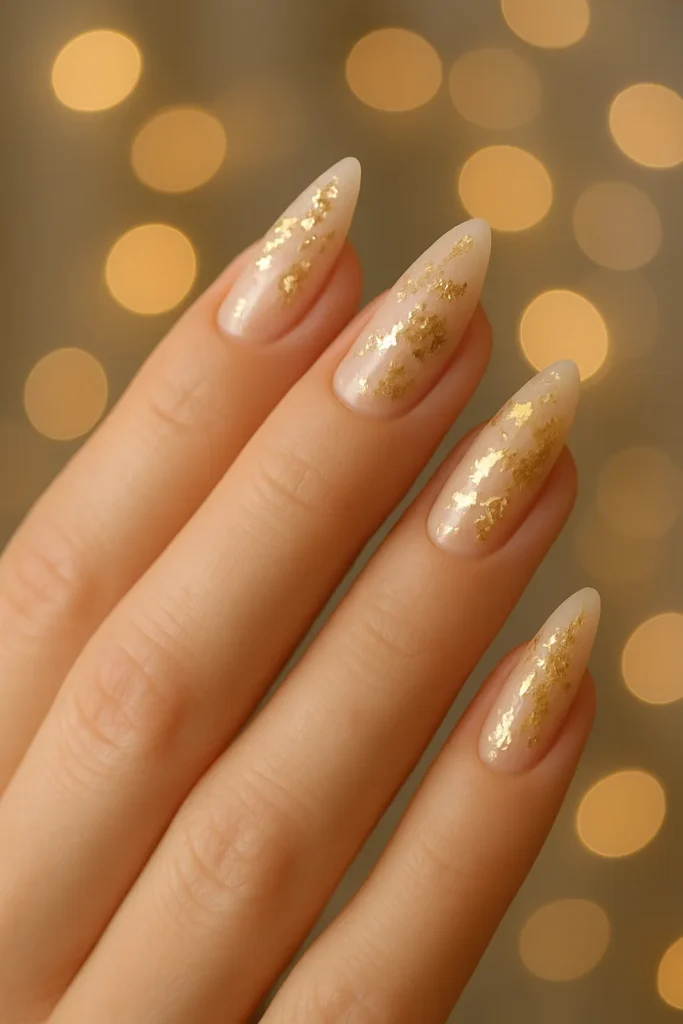
Foil Accents & Metallic Flakes
For a high-end, luxurious sparkle, incorporate metallic nail foil or large metallic flakes. Apply a deep base color like forest green or black, and before it dries, gently press small pieces of gold, silver, or iridescent foil onto the nail surface. This application results in an irregular, fractured metallic look that catches the light beautifully and screams high-fashion holiday.
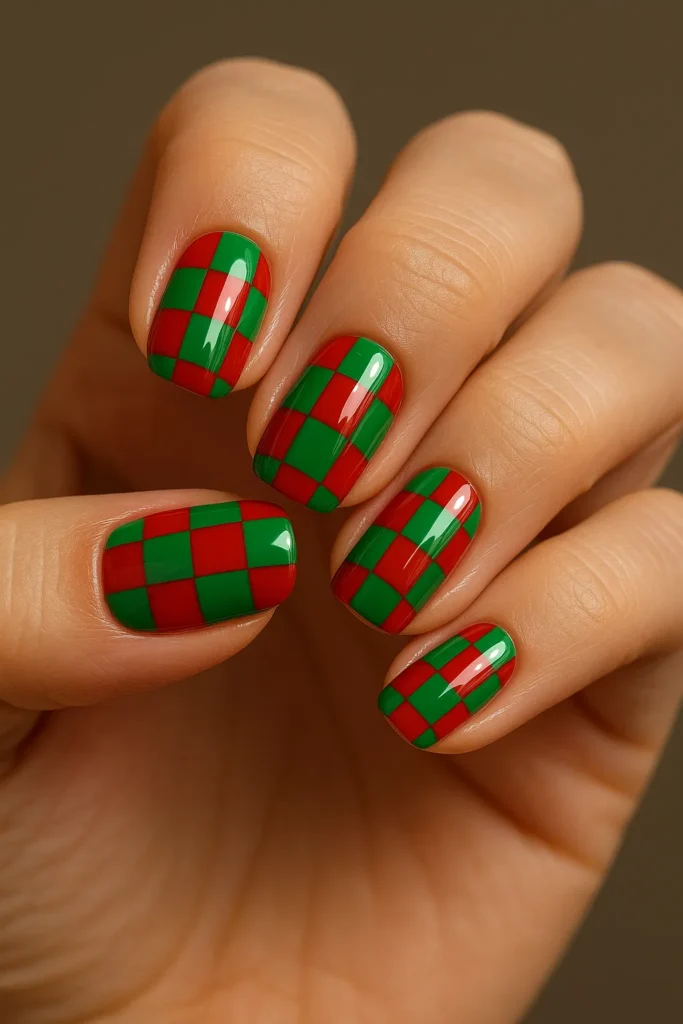
Red and Green Checkerboard
Embrace a bold, graphic, and highly current trend with a playful checkerboard pattern. Choose a vibrant red and a bright emerald green polish, and use a thin striper brush or fine-tipped tool to paint a clean grid pattern on a white base. This geometric look is highly stylized and provides a playful, fashion-forward alternative to classic stripes or dots.
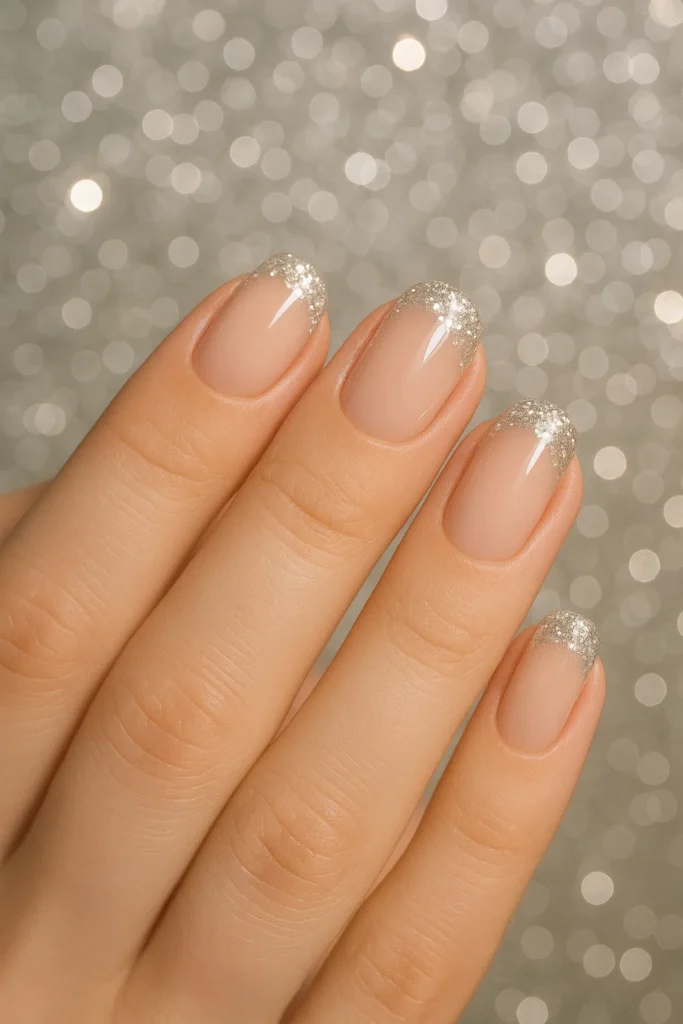
Shimmering Glitter French Tips
Give the classic French manicure a dazzling update by replacing the traditional opaque white tip with a vibrant shimmer or glitter polish. Choose a fine gold, iridescent, or silver glitter and apply it carefully to the tips of your nails over a sheer pink or nude base. This design is effortlessly elegant, provides sparkle without being overwhelming, and is perfect for formal parties.
Holographic Snowflakes
For a magical, modern touch, utilize the highly reflective nature of holographic polish. Apply a pale, icy blue base coat, and then use a fine detail brush and a holographic silver polish to paint delicate, tiny snowflake patterns on an accent nail. When the light hits the nails, the holographic particles will flare into a rainbow spectrum, creating a truly mesmerizing winter effect.

Transparent Snow Globe Nails
Capture the enchanting magic of a snow globe right on your fingertips. Apply a high-shine clear topcoat over your base and while it’s still wet, sparingly sprinkle fine white glitter or micro-dots of white polish onto the nail surface. Seal with another thick layer of clear coat for a smooth, bubble-like finish that gives the illusion of tiny snow suspended in glass.
Elegant Holiday Nails
These sophisticated and classy designs are suitable for formal events, offering refined style with subtle holiday undertones.
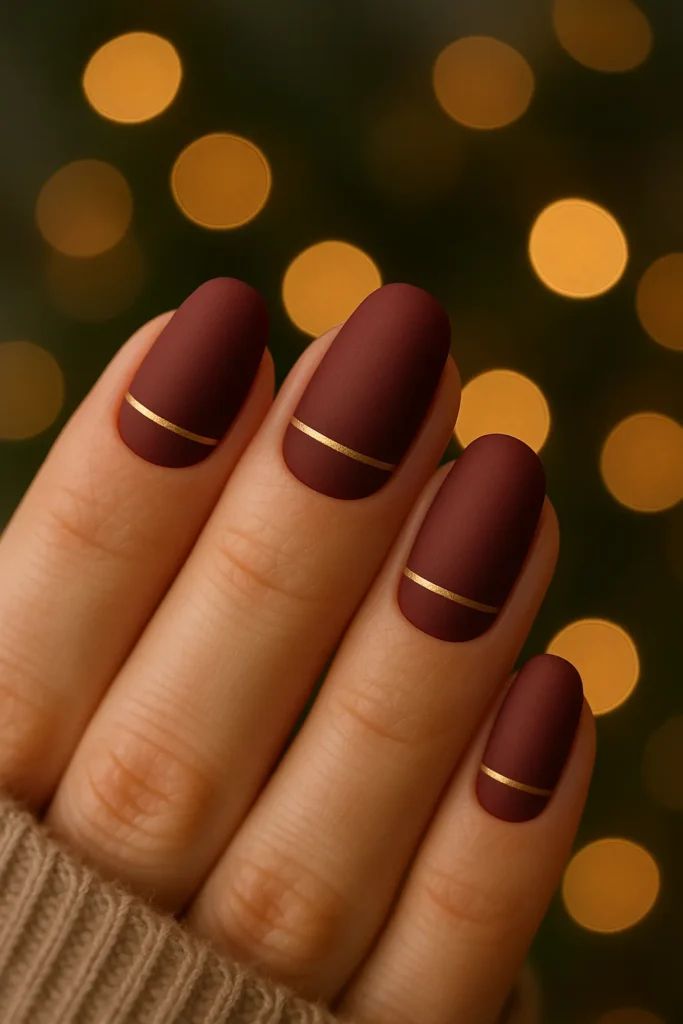
Matte Burgundy with Gold Stripes
This combination is the epitome of luxurious holiday style, pairing a deep, dramatic color with a metallic accent. Apply a rich matte burgundy polish to all nails for a velvety finish. Use a very thin striping brush and gold polish to apply one or two perfectly straight, minimal lines—either vertically down the center or horizontally near the tip. The matte/shiny contrast is incredibly chic.
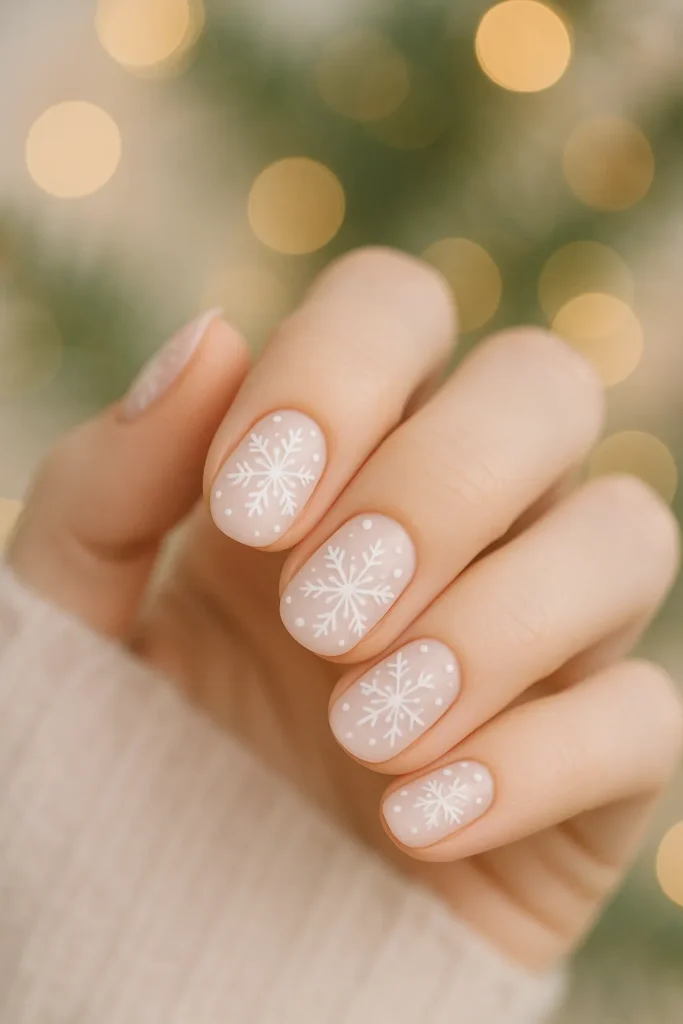
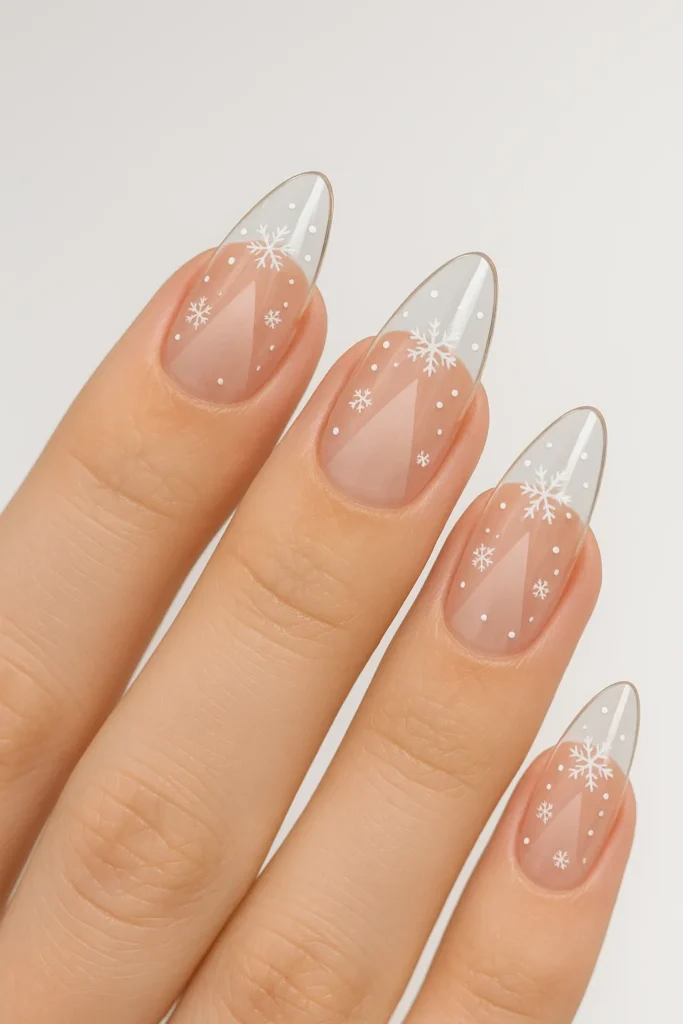
Minimalist White Snowflakes on Nude Base
For a manicure that exudes understated elegance, keep the design simple and the colors soft. Apply a clean nude or sheer pink polish to every nail, ensuring a flawless base. Use a detail brush and crisp white polish to paint one or two simple, small snowflake motifs near the tip or side of the nail. This classic, delicate pattern provides seasonal charm without sacrificing sophistication.

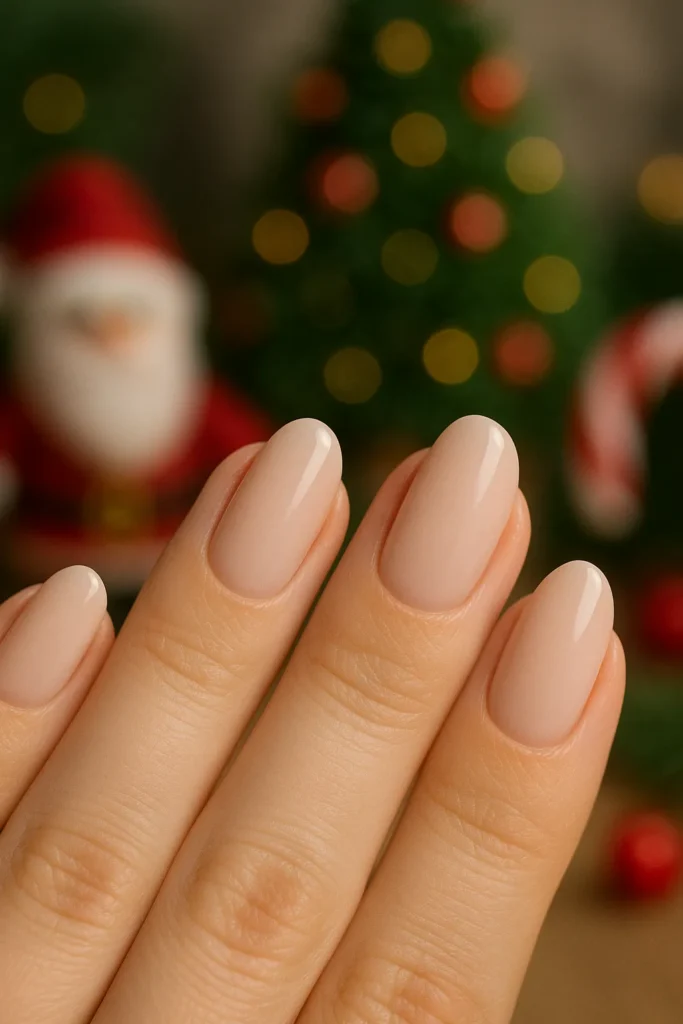
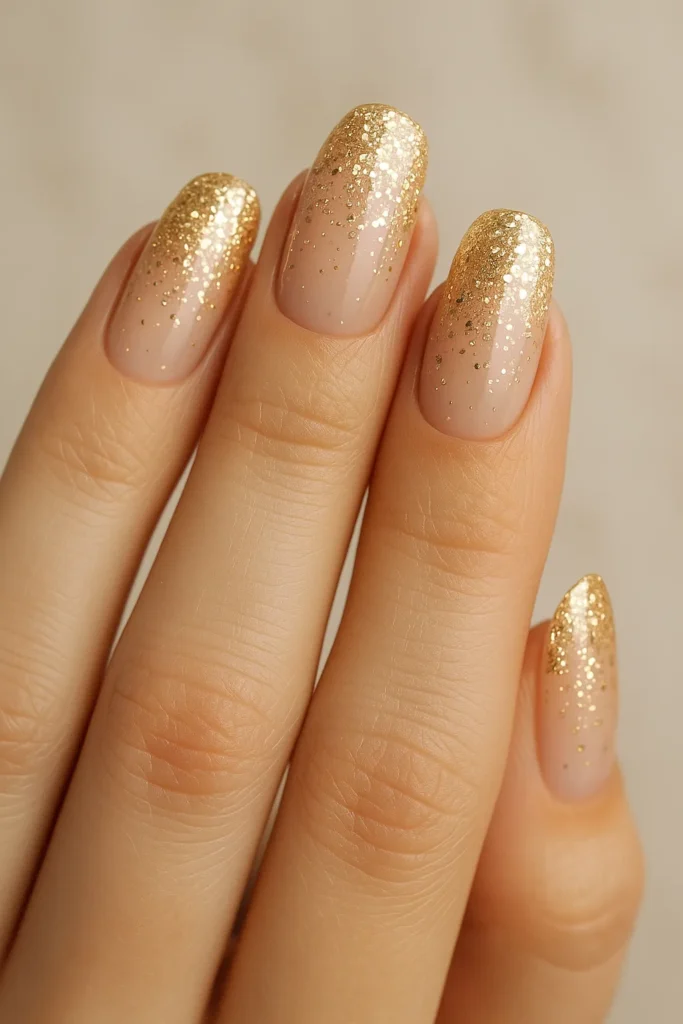
Subtle Glitter Gradient
Achieve an elegant sparkle with a gentle glitter gradient that looks polished and refined. Apply a clear or nude base coat, and then use a glitter polish—preferably a very fine champagne or pale gold—and apply it heavily to the tip, gently brushing fewer and fewer flakes towards the center of the nail. This fades the sparkle into the natural nail color, creating an understated shimmer.
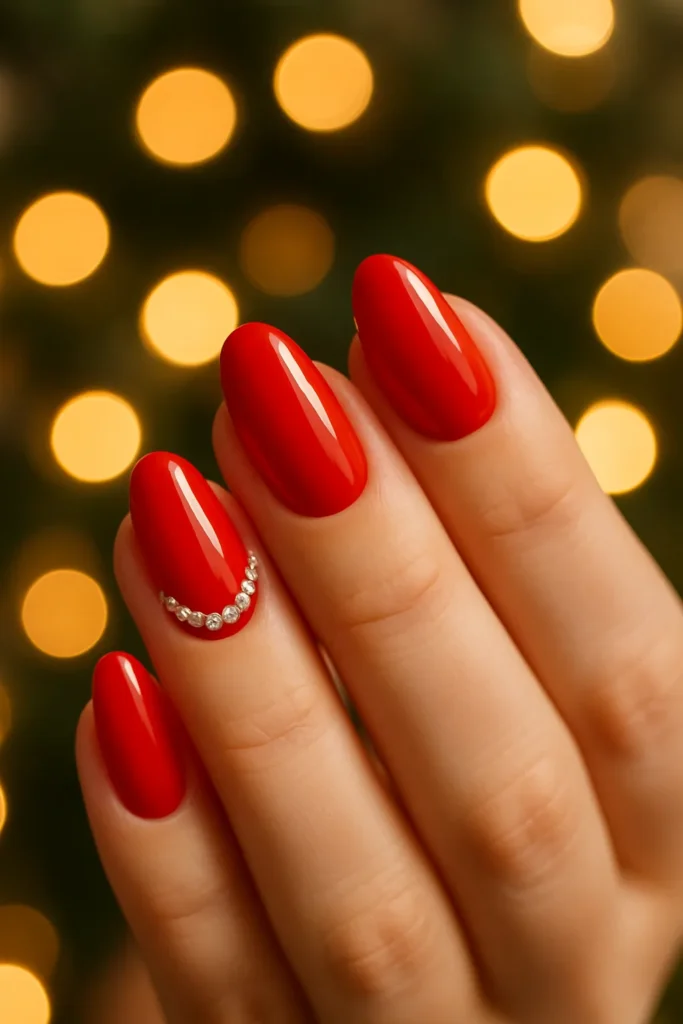
Classic Red with Rhinestone Accent
You can’t go wrong with a classic, high-gloss pillar box red, elevated by a single, luxurious embellishment. Apply a flawless coat of bright red to all nails, and then, while the topcoat is still slightly wet on the accent nail, use tweezers to carefully place one to three small, clear rhinestones near the cuticle. The single, deliberate sparkle adds a touch of expensive glamour.
Monochrome Metallic Tips
Offer a modern, highly elegant twist on the French manicure using a monochromatic metallic polish. Use a deep, dark base like black, charcoal gray, or deep indigo, and apply a clean, sharply defined tip using a high-shine silver or platinum polish. This creates a dramatic, sophisticated contrast that is perfect for upscale holiday parties.

How to Choose the Right Design for Your Style and Skill Level
Choosing the perfect holiday manicure involves balancing your personal aesthetic with your available time and tools. A little planning ensures your festive nails look flawless and last through every holiday celebration.
- Match Design Complexity to Your Experience and Tools: If you are a beginner, stick to simple techniques like Glitter Accent Nails or using Polka Dot Snowflakes, which rely on easy-to-use dotting tools. If you have advanced detail brushes and steady hands, you can tackle intricate designs like Hand-Painted Santa Hats or Geometric Holiday Shapes.
- Consider Nail Length and Shape: Shorter nails are great canvases for bold, simple designs like the Red and Green Checkerboard. Longer nails can beautifully showcase more elaborate scenes, such as Snowman Nail Art or Transparent Snow Globe Nails, where you have more space to play with patterns.
- Mix Simple and Advanced Designs for Balance: A full manicure of 10 heavily detailed nails can look busy. To maintain elegance, choose one or two Accent Nails for your more complex designs and keep the rest of your nails simple with a coordinating color or a subtle Matte Burgundy with Gold Stripes.
- Choose Colors That Complement Your Wardrobe and Holiday Decor: Think about the colors you’ll be wearing most often during parties and gatherings. If your holiday wardrobe features a lot of navy and silver, designs like Monochrome Metallic Tips or Holographic Snowflakes will coordinate perfectly.
Essential Tools and Polishes for Festive Nail Designs
Having the right equipment on hand is key to executing professional-looking DIY holiday nail art. You don’t need a huge collection, but a few specific tools will make all the difference.
- Precision Tools: Invest in a few nail brushes of different sizes, especially a fine thin striper brush for painting straight lines and sharp edges, and a quality set of dotting tools for creating perfect polka dots and precise small details.
- Variety of Polish Finishes: Your polish collection should include more than just classic glossy creams. Pick up specialty polishes like a rich matte topcoat, a chunky and fine glitter polish, and at least one holographic or metallic shade for a trendy finish.
- The Foundation: A quality basecoat is non-negotiable—it prevents staining from highly pigmented reds and greens and helps polish adhere better. Likewise, a reliable topcoat is essential for sealing your art and making sure your festive look lasts through Christmas morning.
- Optional Enhancements: To elevate your designs quickly, consider keeping nail stickers (especially for snowflakes or tiny trees), small packets of rhinestones, or sheets of nail foil on hand.
Conclusion: Transform Your Holiday Nails With These Christmas Nail Design Ideas
This holiday season, let your manicure be a true expression of your festive spirit! We’ve covered everything from the quick charm of Classic Red and Green Tips to the modern luxury of Foil Accents and the sophisticated elegance of Matte Burgundy. With 20 unique designs, there is inspiration here for every skill level, every occasion, and every nail length.
Embrace the joy of creation. Experiment with mixing and matching elements from different categories—perhaps you try the Candy Confetti design on your tips and add a Minimalist Tree as an accent. Don’t forget to use your topcoat diligently to protect your hard work and keep your holiday manicure chip-free for longer.
Try these at home, book a salon session, or explore more DIY festive nails for inspiration!
Frequently Asked Questions (FAQs)
What are some easy Christmas nail designs I can do at home?
Try simple Candy Cane Stripes, which only require tape and two polishes, or the effortless Polka Dot Snowflakes using a dotting tool. The quickest options are always the Glitter Accent Nails, which add festive sparkle with zero artistic skill required.
How can beginners create modern holiday nail art without advanced tools?
You can easily use stickers for precise designs like snowflakes, or use everyday items like bobby pins or toothpicks as makeshift dotting tools. For designs like Negative Space Christmas Patterns, you can use simple office tape to block out areas and achieve clean, modern lines.
Which colors work best for elegant holiday nails?
For sophisticated results, focus on deeper hues like burgundy, deep forest green, and navy, paired with gold or silver accents. Nude and sheer pink bases are also key for designs where you want the focus to be on a subtle sparkle or a fine, minimalist motif.
Can I combine multiple Christmas nail design ideas on one manicure?
Yes, this is highly recommended for visual balance and interest! For example, combine a simple solid color on most nails with a heavily detailed Gingerbread Man Accent on one finger, and perhaps a subtle Shimmering Glitter French Tip on another.
How do I make my DIY festive nails last longer during holiday events?
The key is preparation and finishing. Always apply a quality basecoat before painting. Apply thin coats of polish, letting each layer dry fully. Finish with a high-shine, protective topcoat, and reapply a thin coat of topcoat every two to three days to minimize chipping.